
Click here to get information about how to run Easy Mass Mailer Pro.
Click here to see how to configure your email account information.
Click here to see how to you can easily create your emailing project.
Click here to see how to send a test email and why it is important.
Click here to see how you finally send your email, massively, to all the contacts of one of your mailing lists.
Click here to see how Easy Mass Mailer Pro can browse (using IMAP) all the email addresses from all the emails in your email account's inbox (or other folders) and create a mailing list with these email addresses. Very useful if you have thousands of emails.
Download and run:
By default, the installation file will suggest to install the software in "C:\Program Files\Easy Mass Mailer Pro\" (for the 64-bit version) or in "C:\Program Files (x86)\Easy Mass Mailer Pro\" (for the 32-bit version). But you can choose a different folder if you want.
At the end of installation, you can check a box to run Easy Mass Mailer Pro.
Otherwise, just type "Easy Mass Mailer Pro" in the search bar of Windows.
Or go to "C:\Program Files\Easy Mass Mailer Pro\" (for the 64-bit version) or "C:\Program Files (x86)\Easy Mass Mailer Pro\" (for the 32-bit version) and run "EasyMassMailerPro.exe".
Click on "Language and email account...". You will see this window:
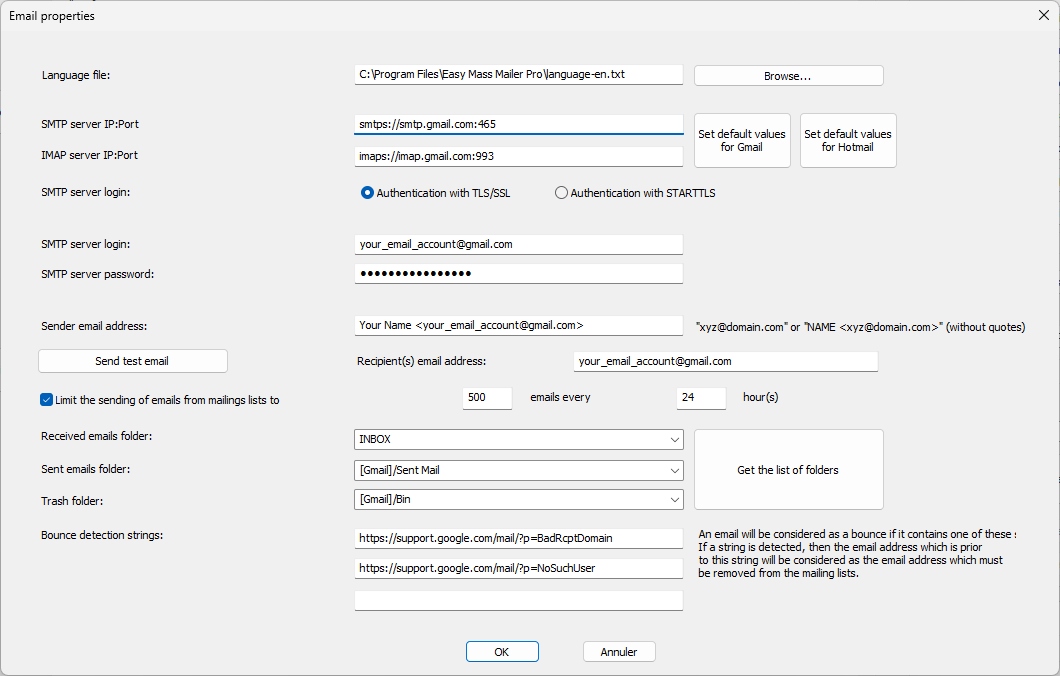
First, you can select a language file. A language file is called:
Note: if you download a language file above, you'll see that it's a ZIP file. Just unzip the language-*.txt file which is in the ZIP file, save the language-*.txt somewhere and load it in Easy Mass Mailer Pro. The language will change instantly.
If you don't find your language, you can create your own language file by using an online translation service and translate (for example) language-en.txt into your own language. Then just load the file you have created. You just make sure that a message on line N in the file language-en.txt is translated on line N in your language file (for example, the sentence in English at line 50 must also be at line 50 in your translated file).
If you have created your own language file, don't hesitate to contact us and send it to us so that we can include it in the next version of Easy Mass Mailer Pro!
Otherwise, if you need the software to be in a given language file, don't hesitate to contact us and we'll do the translation.
But the main goal of this window is to enter the parameters of your email account:
Click on "Mailing lists...". You will see this window:
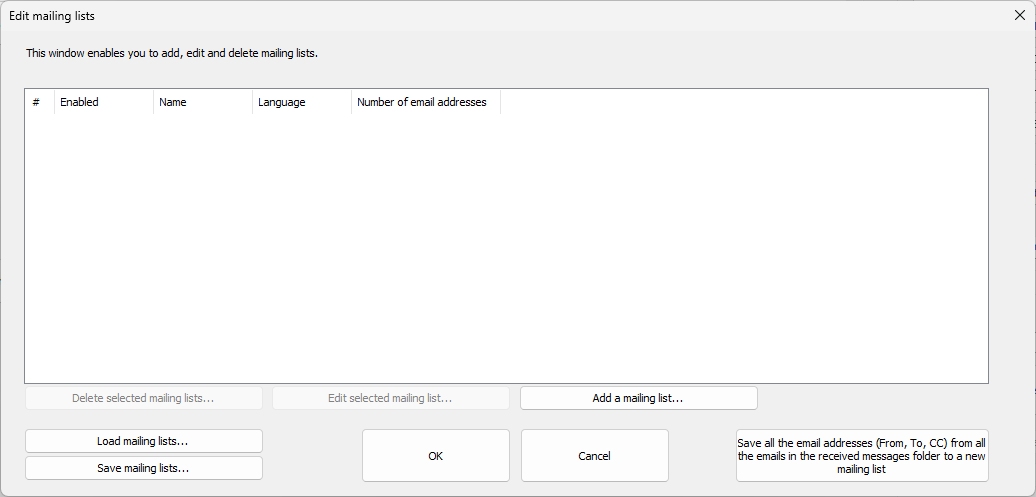
Click on "Add a mailing list...". You will see this window:
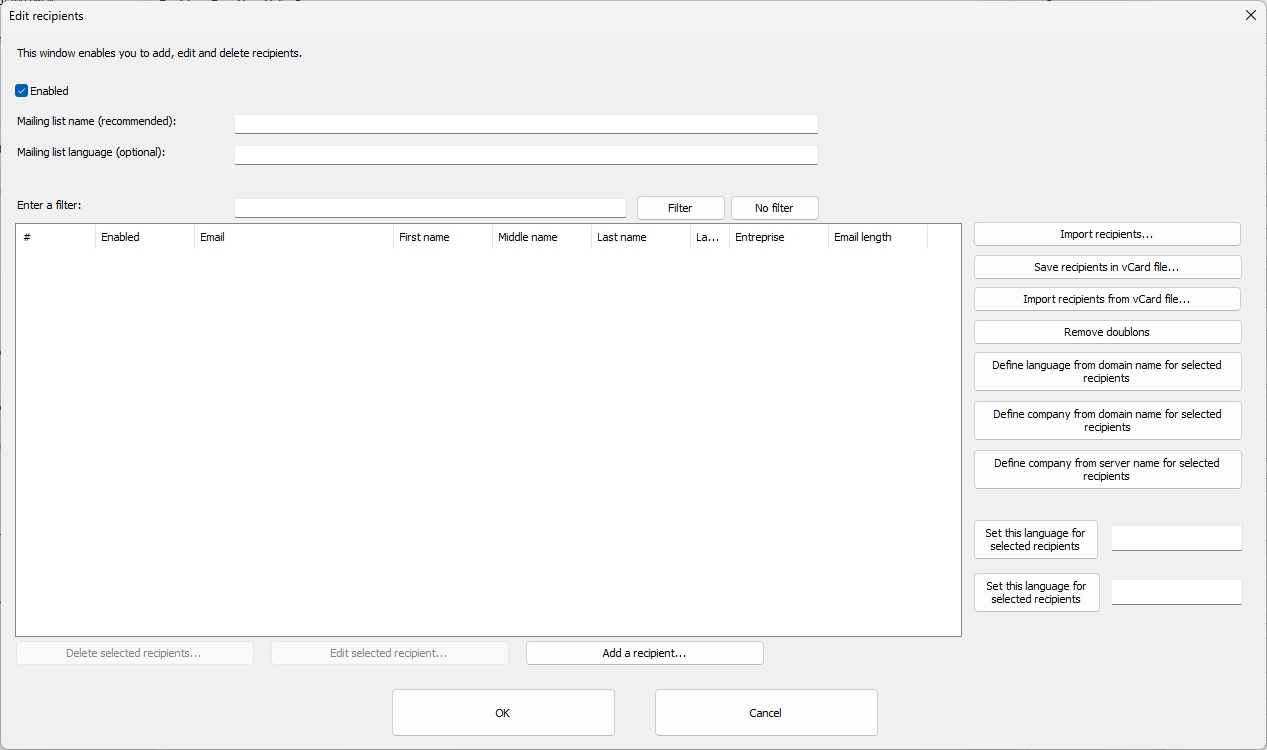
Click on "Add a recipient...". You will see this window:
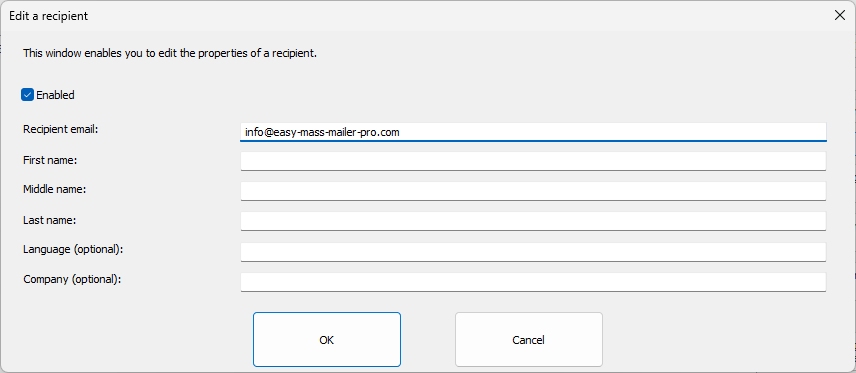
Instead of adding recipients manually, you can also load a file which contains email addresses. Easy Mass Mailer Pro will detect all the email addresses from the selected file and add them to your mailing list. For eample, you can load your database file from Thunderbird.
Let's say you have added 2 recipients. You will see this window:
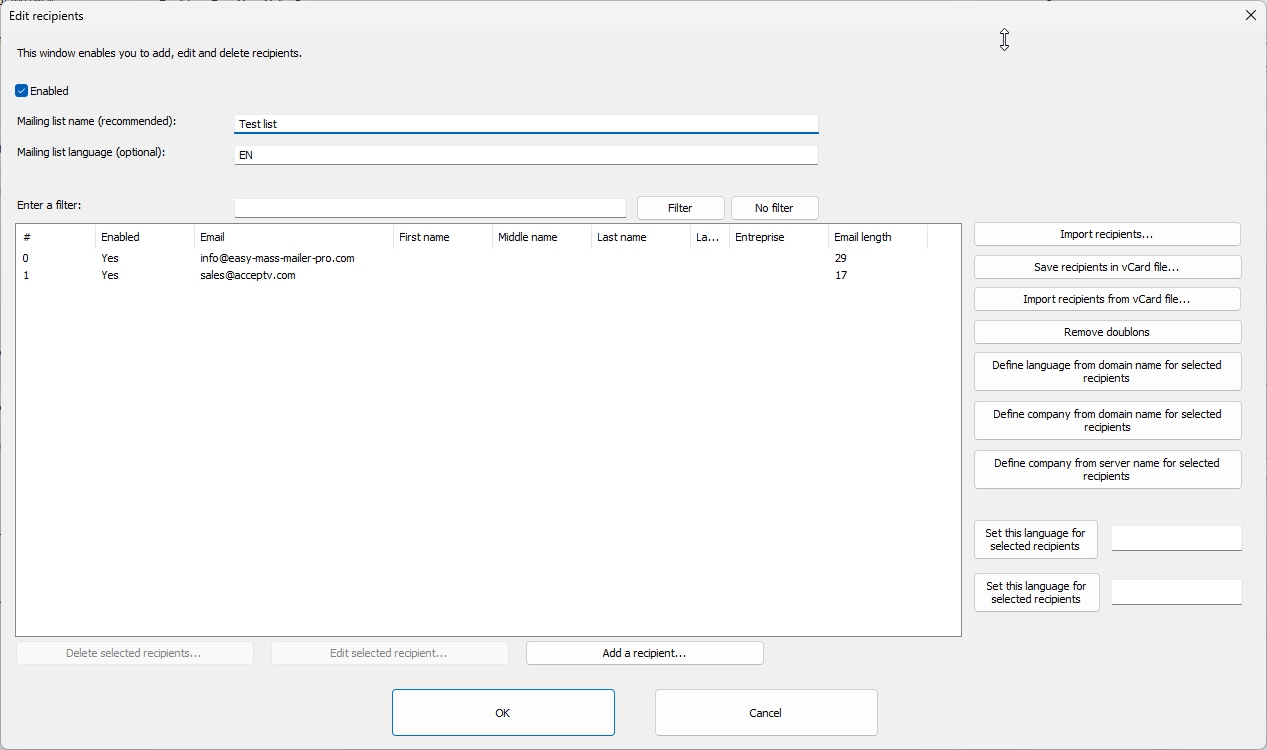
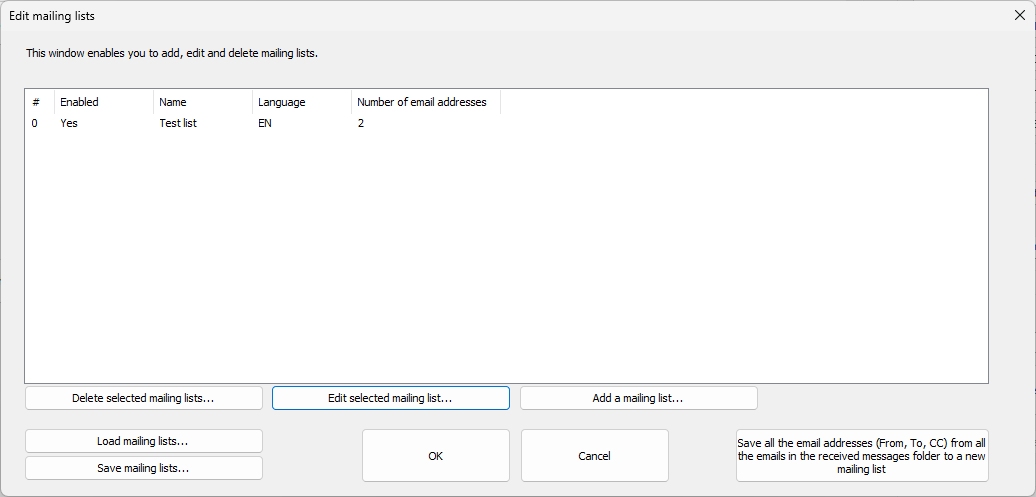
When you close this window and go back to the list of mailing lists, you will see this:
Easy Mass Mailer Pro divides an email in 3 parts:
If you want to have only one part, you can : just don't include any image and leave the bottom part empty.
But most email campaigns are structured using these 3 parts so we think you should like them.
The center image is included in the email. It means that it will always be displayed to the recipient(s). This will increase the size of each email you send. So you should first send yourself a test email to make sure that the email size is not too big. We recommend sending emails with a size lower than 1 MB (megabyte).
You can create a link for the center image in order to enable the recipient to recipient to click on the image to go to a given URL (your web site, for example).
When the image is a JPEG image, Easy Mass Mailer Pro will directly use the file you selected.
When the image is not a JPEG image, Easy Mass Mailer Pro will decode it and convert it to JPEG in order to send it.
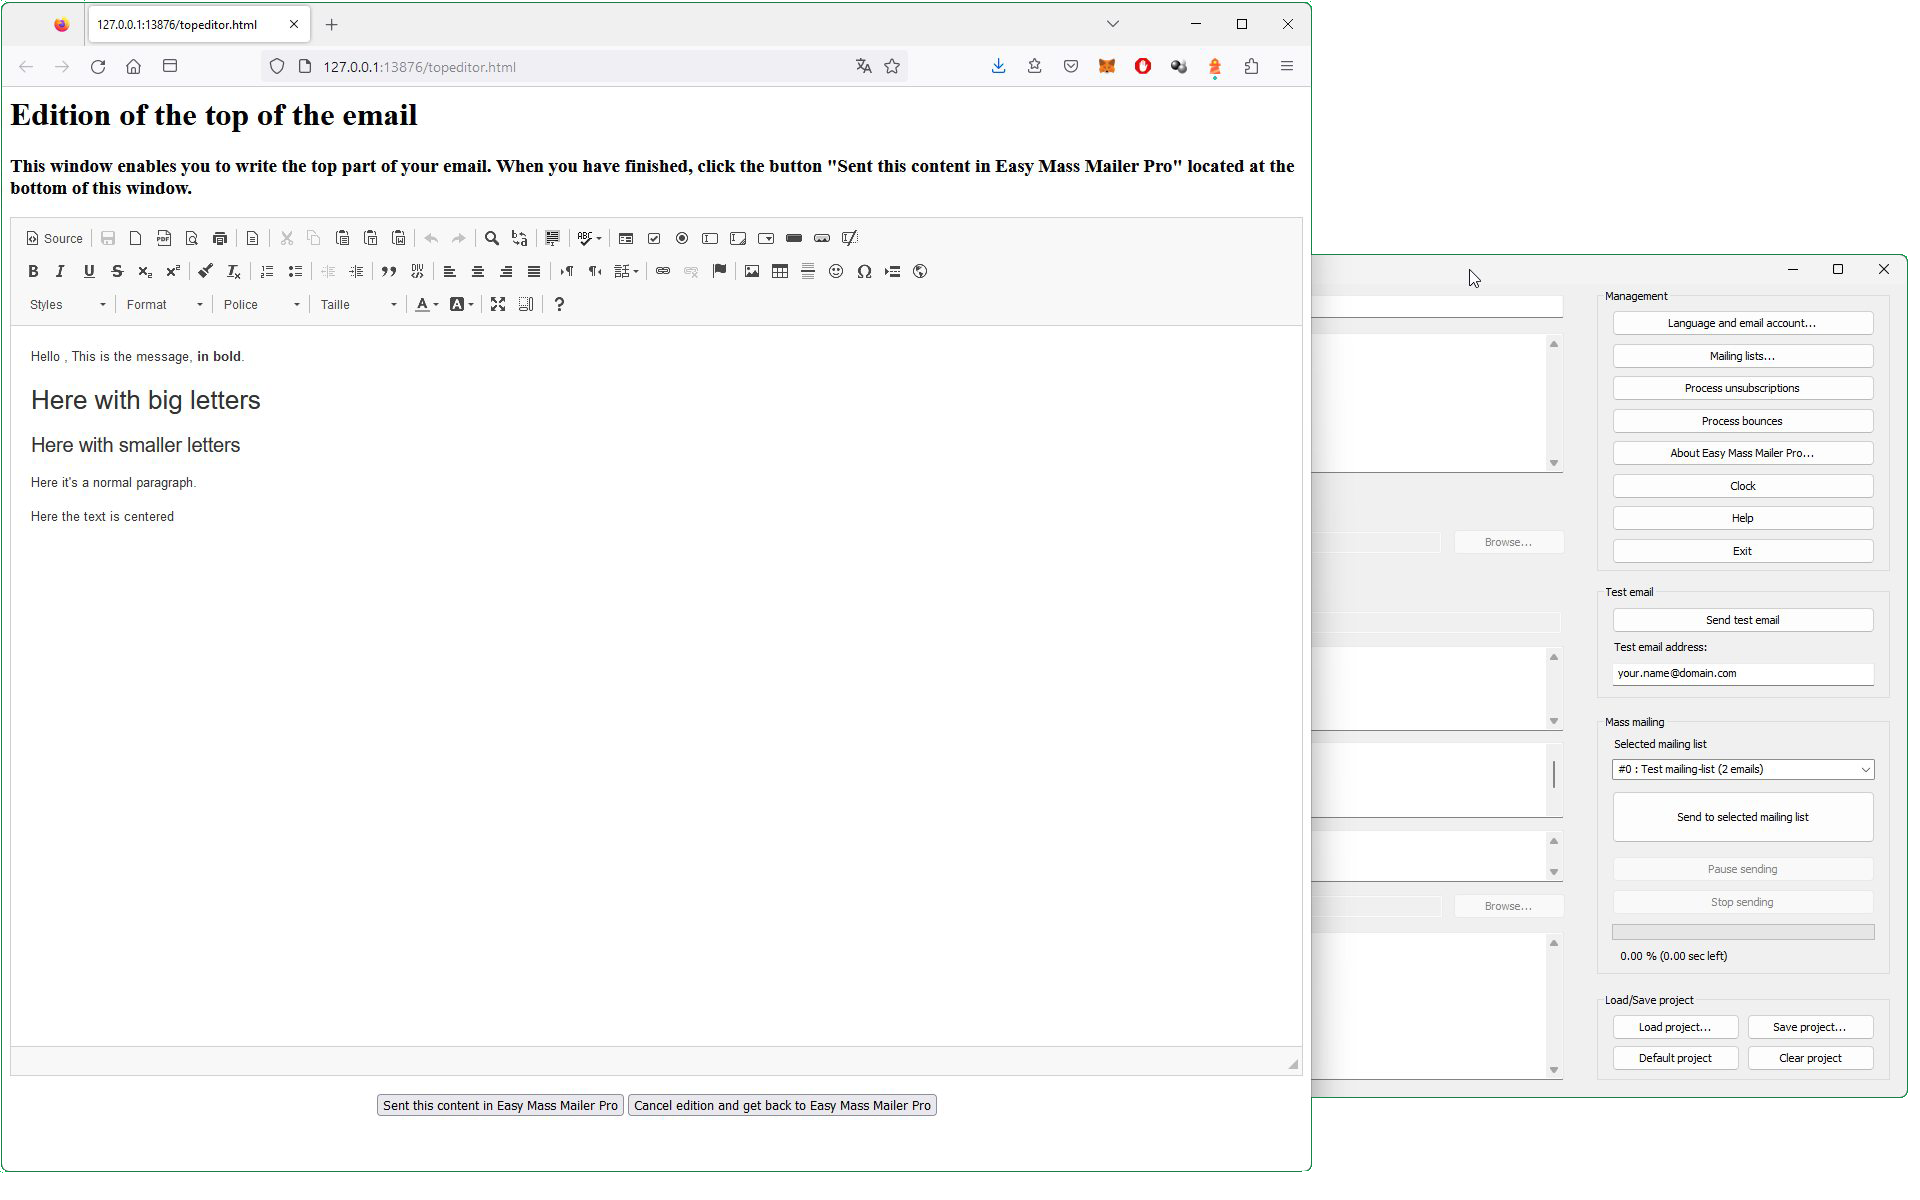
For the top part and the bottom part, you can edit the HTML code in the main window but you can also edit it using an HTML editor in a web browser. To run the web browser, just click the button "Edit top part in HTML editor" or "Edit bottom part in HTML editor". You will see the HTML editor displayd in your default web browser:
Before sending an email to many recipients, it is highly recomnded to send it yourself first.
Just enter an email address in the right part of the main window, click "Send test email" and check your emails box.
When you have received the email, check the email body but also the email subject and the displayed name for the sender.
You should also verify that the hypertext link of the center image works (if you have specified a URL).
At last, you can also check that the "Unsubscribe" link works.
If you use the free version of Easy Mass Mailer Pro, you will get this ad at the end of each email:

To avoid having this message, purchase any license you want (Basic, Standard or Premium). With a purchased license, Easy Mass Mailer Pro does not send this ad.
The recipient of a test email is considered as belonging to a pseudo mailing list having the number -2. That's why the link to unsubcribe will contain "Unsubscribe xyz@domain.com from list -2".
When everything is OK, you can send your email to a mailing list.
Select a mailing list (in the drop-down menu on the right part of the main window) to send your email to. Then click on "Send to mailing list".
You can pause, resume and stop the sending.
If you stop the sending, Easy Mass Mailer Pro will save the position at which you were in the mailing list. And if you re-click on "Send to mailing list", Easy Mass Mailer Pro will ask you if you want to continue from this position or if you want to start from the beginning of the mailing list.
You can detect bounces (email addresses for which the recipient or the server does not exist any more) and automatically remove them from your mailing lists.
Bounces detection is made by browsing all the emails in your "Received emails" folder (inbox) and detecting if they contain an error message.
In the "Language and email account..." window, you can define 3 characters strings for these error messages.
An email will be considered as a bounce if it contains one of these strings. If a string is detected, then the email address which is prior to this string will be considered as the email address which must be removed from the mailing lists.
You can detect people who wish to stop receiving your emails and automatically remove them from your mailing lists.
Bounces detection is made by browsing all the emails in your "Received emails" folder (inbox) and detecting if they have a subject starting with "Unsubscribe" The rest of the subject will contain the email address to remove from the mailing list and the index of the mailing list.
Get all your contacts in one click! Easy Mass Mailer Pro can browse all the emails of your received emails in your email account and insert them into a mailing list.